
 |
| Student created Fantasy Map Photo by Mary Vee |
While on my book tour, I was invited to speak to 6 classes. Rather than lecture the students, I chose to engage them in an activity. A map making activity.
Most fantasy novels have a map in the beginning pages of the book. The purpose is to acquaint the reader with the fictional land where the story takes place.
After hours of studying the fantasy mapmakers on Instagram and practicing the techniques, I had a good grasp of the concept and made the map found in the beginning pages of my new fantasy book, Fire and Thorn.
Here is the how to Make a Medieval/Fantasy map in a nutshell.
 |
| Photo by Mary - Fantasy Maps |
1. Make a border along the four edges of your paper. Many old maps, like treasure maps, end up with torn or yellowed edges. To protect the vital parts of the map, the border is drawn. Make it about 1/2" thick.
 |
| Photo by Mary Vee Students creating Fantasy maps |
2. Decide how many kingdoms you want on your map. Due to the limited space, choose one, two, or three. No more. Draw lines separating the countries. Make it squiggly for a puzzle piece look.
 |
| Photo by Mary Vee Students Creating Fantasy Maps |
3. Each kingdom needs a castle for the king. One castle per kingdom. Give it a mote. Drawbridge. Flags. Perhaps a princess in a window. Soldiers with weapons. Etc. Every detail added needs to be small...teeny tiny in order have enough space for other additions.
 |
| Photo by Mary Vee Student creating her map |
4. The people in the castle will need water and will not want to walk far to get it. Draw a river near the castle. Each kingdom--one castle. Each castle--at least one river.
 |
| Photo by Mary Vee Student creating her map. |
5. The water from the river comes from the snow-capped mountains upstream. Draw mountains at the source of each river. The river can be extended to end in an ocean or lake.
6. Add habitats for the creatures. Deserts: cacti, dunes, sandstorms, rattlesnakes. Forests: Bats, coyotes, wolves, etc. and so forth. To draw a forest make a triangle with a line (like a popsicle). Draw a second triangle touching the first. Add a third one touching the second. Add as many more as you wish. Draw the appropriate creatures, including dragons, unicorns. One student created a snake-tiger. Create away! Add villages. Thatched roofs. Campfires with pots to cook food, and more.
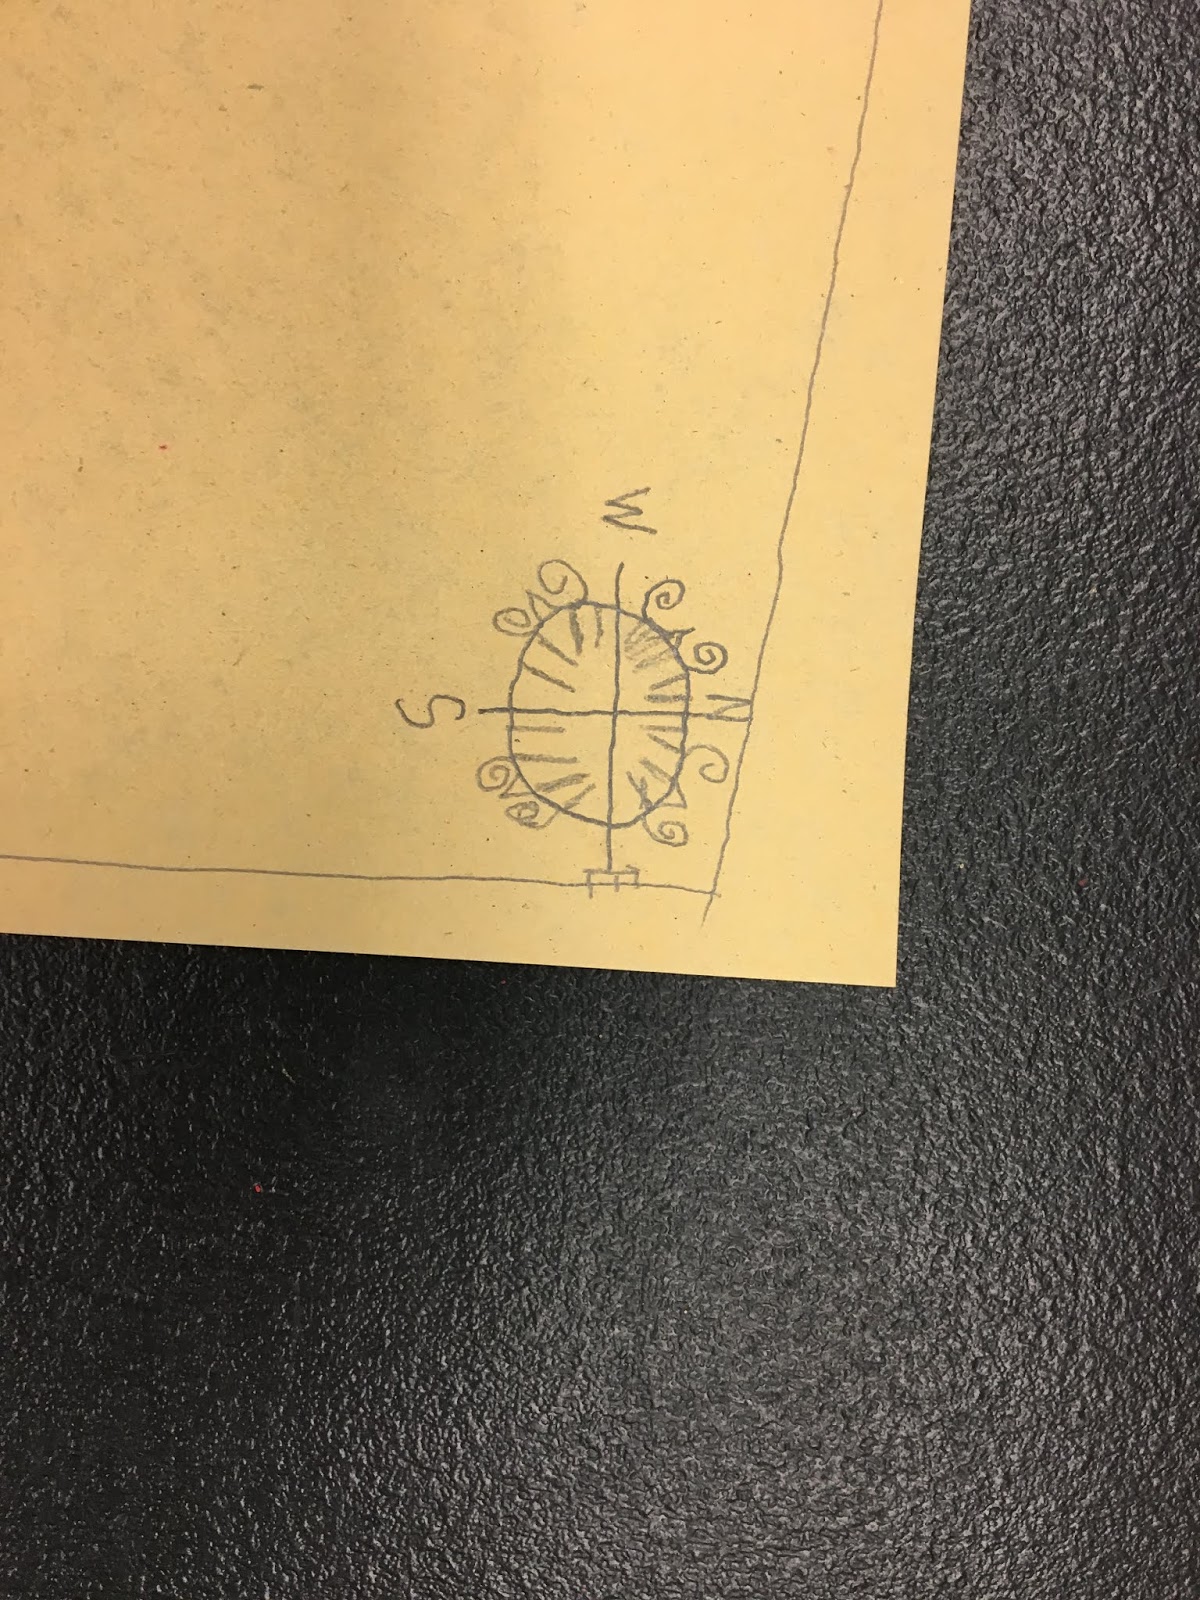 |
| Photo by Mary Vee Student creating his ornate compass rose |
7. Add a compass rose. Fantasy map makers will spend more time creating an ornate compass rose than the entire rest of the map. So, put lots of details, swirls, anything to jazz it up.
 |
| Photo by Mary Vee Finished Fantasy Maps |
8. Each kingdom needs a name. This can be a made-up word. I used: Malum, Vista, and Aerlis for my three kingdoms. Use block letters. To help viewers see the kingdom name put a box around the word with a dark line.
By this point, the map should be CROWDED with amazing details.
Feel free to share these instructions with a Fantasy reader you know. THEN tell them how they can take a quest in my new fantasy, Fire and Thorn.

The day the king of Aerlis heroically dies and his lovely queen is viciously carried off to the dark north, dragons invade the land. Crops and homes near the border burn to the ground. Prince Gilbert must give up what he wants most to save his father’s kingdom and himself. Far away lies the answer. Something unseen. To save the kingdom he must go on a quest to bring the unseen back. A quest filled with danger. There seems an easier solution in the vast north. One that offers great wealth and power. Time is short. One choice will save his kingdom. The other will silence him and his people—forever.
This post has been brought to you by the one-word: FantasyMapMakingFun

Comments